Effective date: August 19, 2025
Contents
- 1.Introduction; Scope of this Policy.
- 2.Where We Are a Service Provider.
- 3.Personal Data We Collect About You and Why.
- 4.Cookies and Similar Tracking Technologies.
- 5.Online Analytics and Advertising.
- 6.Information We Disclose.
- 7.International Users.
- 8.Your Data Rights and Choices.
- 9.Notice to California Residents.
- 10.Your Rights and Control under EU GDPR.
- 11.Data Security and Integrity.
- 12.Retention and Removal.
- 13.Right to Revise.
- 14.Contact Details.
- 15.Privacy Contacts.
Introduction; Scope of this Policy.
The purpose of this Privacy Policy (the “Policy”) is to describe how we collect, use, store, protect, and disclose personal data online and offline either via our websites or related applications. This Policy applies to personal data we collect or use, and applications owned or controlled by Governmentjobs.com, Inc. (DBA “NEOGOV”), including our related brands NEOGOV.com, NEOED.com, PowerDMS.com, Governmentjobs.com, Schooljobs.com, and our mobile app(s) (collectively referred to as the “Services”), or affiliated companies (collectively referred to herein as “Governmentjobs”, "Schooljobs", “NEOGOV”, “NEOED”, “PowerDMS”, “we”, “us”, or “our”).
By using any part of the Services you agree that you have read this Policy, your personal data will be processed as described herein, and you agree to be bound by this Policy. This Policy is incorporated into our Terms of Use. Definitions not explicitly defined herein shall retain the meaning as prescribed in the Terms of Use. Any dispute related to privacy is subject to the Terms of Use and this Policy, including limitations on liability.
This Policy does not apply to (1) personal data controlled by our Customers (employers that utilize our Services, described further below), which is governed by our separate agreements and related data processing agreements with such Customers; (2) personal data collected by unaffiliated sites that link to or are accessible from our Services; (3) personal data our partners may collect directly from you and control; (4) personal data collected and processed by us about our employees or job applicants responding to our job offers; and, (5) non-personal data derived from personal data, including any data that is aggregated, de-identified, or anonymized, statistical data, insights, or other predictive data that is sufficiently different from your personal data that it cannot be reversed engineered through reasonable means, or otherwise identified from analysis or further processing of the derived data (collectively referred to as the “De-Identified Platform Data”). We use De-Identified Platform Data to provide Customers with useful and relevant insights, build features and data services, and improve our Services. Because De-Identified Platform Data does not identify you personally, we can use and disclose it in our discretion.
We are the controller for the personal data discussed in this Policy, except as noted in the “Where We Are a Service Provider” section below.
Where We Are a Service Provider
Our Customers are organizations such as federal, state, local, tribal, or other municipal government agencies (including administrative agencies, departments, and offices thereof), private businesses, and educational institutions (including without limitation K-12 schools, colleges, universities, and vocational schools), who use our Services to evaluate job applicants and/or manage their relationship with their personnel. When we provide our Services to our Customers, the Customer generally controls and manages the personal data (which may include sensitive personal data such as biometric information or your precise geolocation information for timeclock tracking, health information, and demographic information like race and ethnicity related to the employment relationship), and we process personal data as a "data processor" or "service provider" (as these terms are defined in applicable data protection laws). Any use of analytics or engagement technologies that process personal data, including tools that analyze user behavior or associate usage with identifiers, are implemented solely as a data processor or service provider in these scenarios, and such data is not used by NEOGOV for its own commercial purposes. Our legal obligations as a processor and service provider are set out in our Customer contracts and policies. Our Customers, and not us, decide what types of personal data to collect to manage their relationships with you. For example, a Customer may choose to enable collection of biometric or precise location data for its employees using our time and attendance product. We process such data only at the direction of that Customer and do not use it for our own purposes.
Further, if you apply to a job or your employer utilizes our Services to manage their relationship with you, the personal data collected about you is generally controlled by the employer (our Customer). This Policy does not describe the processing of your personal data by our Customers, and we encourage you to visit the Customer’s privacy policy for information about their privacy practices. For example, if you applied to a job at a local state agency, you should contact that agency with any questions you may have relating to the personal data processing by that state agency within our Services.
Where we serve as a data processor or service provider, our Customer contracts and policies require us to either instruct you to contact our Customer, or redirect your inquiry to our Customer.
Personal Data We Collect About You and Why.
In this Section we set out general categories of personal data we may collect and the purpose for using your personal data, including the personal data collected and processed over the past year. We collect and process personal data to provide you the Services, fulfill our contractual responsibility to deliver the Services to our Customers, fulfill your requests, and pursue our legitimate interests and our business and commercial purposes. We also automatically collect data during your usage of the Services and collect other personal data about you from other sources. Your personal data will only be collected and used for purposes stated herein, where you provide additional consent, or as required by law or regulation - including national security or law enforcement requirements.
We collect personal data from you directly when you visit our Services from either your computer, mobile phone, or other device, attend one our events, or communicate with our personnel. The categories of personal data we collect from you, involve the following:
| Types of Personal Data |
Why the Personal Data is collected |
|
Identification, account, and contact data, including your name, username and password, professional or personal email address, professional or personal telephone phone number, and account preferences.
|
-
Create your account, perform and manage our relationship with you and our Customers, and facilitate the relationship between you and our Customers for their hiring and employment purposes.
-
Communicate with you and send you information as part of the Services regarding your questions, comments, requests for information, contests you entered into, upcoming events, newsletters and surveys, technical notices, security alerts, statements and invoices, support and administrative messages, significant updates to the Services or policies, as well as relevant notifications regarding your account.
-
Notify you about our Services and events that we believe will interest you, for our legitimate interests in conducting direct marketing, or to the extent you’ve provided your consent. If you purchased or sent us an inquiry regarding our Services, we may send you information about similar Service you may be interested in. To learn how to manage these communications, see the “Your Data Rights and Choices” section of this Policy.
-
Provide support services, answer your requests, comments, and questions, troubleshoot, and diagnose problems with our Services.
-
Verify your identity, respond to legal requests, enforce our legal agreements where applicable, prevent fraud or potentially illegal activities, maintain security, and screen for and prevent undesirable or abusive activity.
|
|
Profile and employment data including your name, professional or personal postal address, professional or personal e-mail or telephone number, employer name and general location, job title or area of expertise, work experience and performance data, search history, job interest cards, education history, skills, certificates, and licenses.
|
-
Perform and manage our relationship with you and our Customers, and facilitate the relationship between you and our Customers for their hiring and employment purposes.
-
Provide you personalized recommendations of content, features, and Services, including to enable you to search and apply for jobs, match you with employers and job listings, help our Customers find and contact you, and display targeted notices and messages from our Customers.
-
Make improvements, enhancements, or modifications to the Services through data analysis and research of usage trends, and feedback sessions.
-
Conduct research on social, economic, and sectoral employment and hiring trends.
-
Provide support services, answer your requests, comments, and questions, troubleshoot, and diagnose problems with our Services.
-
Verify your identity, respond to legal requests, enforce our legal agreements where applicable, prevent fraud or potentially illegal activities, maintain security, and screen for and prevent undesirable or abusive activity.
|
|
Communications and publication data including communication content within emails, phone and other voice recordings, online forms, chats, forums including our Customer Community, date and time of the communication, and the communication method.
|
-
Make improvements, enhancements, or modifications to the Services based on your feedback collected through feedback sessions or content you post within our Services or the Customer Community about your experience using our Services.
-
Determine Services, events, newsletters, or contests that we believe will interest you and notify you.
-
Provide support services, answer your requests, comments, and questions, troubleshoot, and diagnose problems with our Services.
-
Verify your identity, respond to legal requests, enforce our legal agreements where applicable, prevent fraud or potentially illegal activities, maintain security, and screen for and prevent undesirable or abusive activity.
|
| Contact preferences data including marketing content preferences, and the status of whether you opted-out of our marketing notices. |
-
Manage and track your preferences for communications you receive from us, identify trends in the interactions with our Services, and measure the performance of our communications.
-
Make your profile viewable to employers, depending on your settings.
|
|
Transaction and billing data including the Service purchased, billing details, financial data corresponding to your selected method of payment (e.g. a credit card or a bank account number), which is collected by third-party payment processors on our or our customer's behalf.
|
-
To facilitate your payment and billing for Services, facilitate payroll and tax Services for our Customers, and detect and prevent fraud.
|
You may voluntarily submit other personal data to us through our Services that we do not request and are not required for the relevant data processing activity.
With the help of our Service Providers, we may also automatically collect personal data about you and your device and how you interact with our Services. Categories of personal data collected automatically include the following:
| Types of Personal Data |
Why the Personal Data is collected |
|
Usage data including Services you purchase, IP address, webpages visited, what you click on, features you use, how often and when you use the Services (including the date and time of your access or use), general location of usage, jobs performed, Service configurations, browser type and version, browser language, internet service provider, domain name, error logs, e-mails you view, and the subject of the ads you click or scroll over. In some cases, usage data may be linked to identifiers such as your name or email address, solely to support product experience and engagement analytics at the direction of our Customers; and,
Device data including device address or other unique device identifying numbers, type of device, software and hardware attributes, your operating system, system and performance data, and mobile application permissions including cellular data, general geolocation, access to photos, camera, calendars, and reminders.
|
-
Perform and manage our relationship with you and our Customers, and facilitate the relationship between you and our Customers for their hiring and employment purposes.
-
If our Customer uses more than one of our Services, we may combine usage data across those Services to enable product insights, engagement analytics, and user support. This information is used solely on behalf of our Customers and not for NEOGOV’s own marketing or promotional purposes.
-
Track your preferences and provide you personalized recommendations of content, features, and Services.
-
Make improvements, enhancements, or modifications to the Services.
-
Produce De-Identified Platform Data and conduct research on social, economic, and sectoral employment and hiring trends.
-
If our Customer utilizes our mobile application or our time and attendance services where you clock in and out of your job, we may collect data based off your fingerprint or facial ID. This biometric data is collected and processed solely on behalf of our Customers, and is only applicable to their employees or personnel. We do not collect biometric data from users of Governmentjobs.com. For more information regarding our use of Biometric data, please see our Biometric Data Notice.
-
Verify your identity, respond to legal requests, enforce our legal agreements where applicable, prevent fraud or potentially illegal activities, maintain security, and screen for and prevent undesirable or abusive activity.
|
|
Location Data may be collected in various ways, including through your device’s IP address, Wi-Fi connection, or GPS technology.
We may collect general location data, such as country, state, city, or postal code, to support the Services, provide regional customization, conduct analytics, and ensure compliance and security.
Additionally, if your employer (our Customer) uses our time and attendance product, we may collect precise geolocation data (e.g., latitude and longitude coordinates) at the time of clock-in or clock-out. This precise location data is collected only as directed by the Customer and used solely for timekeeping and related functionality.
|
-
Where one of our Customers utilizes our time clock features and you use it to punch in and out of your work shifts.
-
Verify your identity, respond to legal requests, enforce our legal agreements where applicable, prevent fraud or potentially illegal activities, maintain security, and screen for and prevent undesirable or abusive activity.
|
|
Log and other automatic data collection including data about the nature of each access, IP address, ISP, files viewed, content changes in certain cases, operating systems, device type and timestamps, pages you view, links you click, touch stream data, movement, scroll, keystroke activity, browser type, access times, and third-party sites and services you were using before and after interacting with our Services.
|
-
Track your preferences and provide you personalized recommendations of content, features, and Services.
-
Make improvements, enhancements, or modifications to the Services.
-
Ensure you can use our Services in conjunction with other services and facilitate your use of integrations.
-
Produce De-Identified Platform Data and conduct research on social, economic, and sectoral employment and hiring trends.
-
Verify your identity, respond to legal requests, enforce our legal agreements where applicable, prevent fraud or potentially illegal activities, maintain security, and screen for and prevent undesirable or abusive activity.
|
|
Cookies, pixel tags (“web beacons”), HTML Storage Objects, web tags, and embedded scripts within our communications and on our Services to collect data related to usage, location, device and logs.
|
-
Among other reasons, we use various cookies and other tracking technologies to provide our Services, authenticate users when visiting our Services, for security purposes (e.g., to prevent fraudulent use of the Services and protect our Services generally), track your preferences, provide personalized recommendations of content, features, and Services, deliver more relevant ads to you as you browse the web, including ads on websites and applications other than on our Services, and help us understand how our websites and communications are being used. For more information on Cookies see the “Cookies and similar Tracking Technologies; “Do Not Track” section immediately below.
|
We and our service providers may use a variety of technologies to collect information about your device and use of our Services as discussed immediately above. Most web browsers can be programmed to accept or reject the use of some or all of these technologies, although you must take additional steps to disable or control other technologies. Among these technologies include:
- A cookie is a file containing an identifier (a string of letters and numbers) that is sent by a web server to a web browser and is stored by the browser and device you use to access our Services. The identifier is then sent back to the server each time the browser requests a page from the server. Cookies may be either “persistent” cookies or “session” cookies. A persistent cookie will be stored by a web browser and will remain valid until its set expiry date, unless deleted by the user before the expiry date; a session cookie, on the other hand, will expire at the end of the user session, when the web browser is closed.
- A web beacon (also called a web bug or clear GIF) is a graphic on a webpage or in an email message that is designed to monitor who is reading the page or message. Web beacons are often invisible because they are typically only 1-by-1 pixel in size. Web beacons are often used alongside cookies to track activity. Web beacons may be used to add data to a profile about a site visited, provide an independent accounting of how many people have visited a website, gather statistics about usage, among other things.
- HTML Storage Objects are program code that collects data about your activity on our Services. The HTML is temporarily downloaded onto your device while you are connected to our Services.
Please note that you can change your settings to notify you when a cookie is being set or updated, or to block cookies altogether. Please consult the "Help" section of your browser for more information (e.g., Microsoft Edge, Google Chrome, Mozilla Firefox, or Apple Safari). By blocking any or all cookies, you may not have access to certain features or offerings of the Services.
We may use third-party web analytics services on our Services, such as those of Google Analytics, Hubspot, LinkedIn, Hotjar, Gainsight and others. These service providers use the sort of technology previously described in the “Personal Data We Collect About You and Why” section to help us analyze how users use the Services, including by noting the third-party website from which you arrive. The information collected by the technology will be disclosed to or collected directly by these service providers, who use the information to evaluate your use of the Services. We also use Google Analytics for certain purposes related to advertising, as described in the following section. To prevent Google Analytics from using your information for analytics, you may install the Google Analytics Opt-out Browser Add-on by clicking here.
In some cases, we may also associate analytics and usage data with identifiers such as your name or email address, but only as needed to enable our Customers to analyze user engagement, feature usage, or onboarding effectiveness. These tools are used solely on behalf of our Customers to support the Services they direct us to provide. For example, we use Gainsight to support in-product analytics and engagement, on behalf of our Customers, and subject to our role as a service provider.
We may personalize the content and advertising that you see when using the Services through the use of third-party advertising technologies that allow for the delivery of relevant content and advertising on the Services, as well as other websites you visit and other applications you use. These third-party advertising technologies may include Google Ads, DoubleClick, Twitter, AddThis, ShareThis, and others. The ads may be based on various factors such as the content of the page you are visiting, information you provide such as your age and gender, your searches, demographic data, and other information we collect from you. These ads may be based on your current activity or your activity over time and may be tailored to your interests.
We neither have access to, nor does this Policy govern, the use of cookies or other tracking technologies that may be placed on your computer, mobile phone, or other device you use to access the Services by non-affiliated, third-party ad technology, ad servers, ad networks or any other non-affiliated third parties. Those parties that use these technologies may offer you a way to opt out of ad targeting as described below. If you are interested in more information about tailored browser advertising and how you can generally control cookies from being put on your computer to deliver tailored advertising, you may visit the Network Advertising Initiative’s Consumer Opt-Out link or the Digital Advertising Alliance’s Consumer Opt-Out link to opt-out of receiving tailored advertising from companies that participate in those programs. You can also use the options below in the "Rights Regarding Your Information" section below.
Please note that you may still receive advertisements even if you opt out of tailored advertising. In that case, the ads will just not be tailored. Also, we do not control any of the above opt-out links and are not responsible for any choices you make using these mechanisms or the continued availability or accuracy of these mechanisms.
We also receive your personal data described in this Policy from third party sources, including from your employer (our Customer), third party companies from which we purchase personal data, partners (including but not limited to partners listed on our Marketplace), accreditation agencies, and co-organizers and sponsors for our events and webinars.
Partners. We collect and use personal data originally collected by partners for joint product and marketing opportunities. For example, we receive profile data about the status of background checks and assessments you participate in, updates from payment processors regarding your purchases, receipts and analytics for text communications and emails you send and receive, or other profile data from integrated systems employers choose to connect with our Services. If you sign into our Services with Facebook or other single sign on services, we import the requested data from your account.
Data brokers. We purchase additional contact data to supplement and correct the contact and employment data we collect, including your name, professional or personal email address, professional or personal telephone phone number, employer name and location, job title or area of expertise.
Public sources. We collect personal data from publicly accessible websites and government sources, including your name, email address, and other profile data such as job title, employer name, and professional expertise.
We combine personal data about you from your use of the Services with other personal data we obtain about you from third parties and use such information in accordance with this Policy.
If you believe that your personal data was improperly collected or provided to use by one of the sources described above, please contact us at privacy@neogov.com.
The PowerLine Application (“App”) is an app designed to help maximize your mental wellbeing by providing information and connecting you with others that have had similar life experiences. If your employer has sponsored your access to our App, we will collect the minimum personal information necessary to set up your access to the App (name, email address). Your interactions on the App will be anonymous with respect to other users, as other users will only know you by an anonymous identifier. Be careful what you share with others through the App, especially regarding your personal data.
As you use the App, we collect information only insofar as is necessary or appropriate to fulfill the purpose of your interaction with the App. We may collect the following types of usage data when you use the App:
- Measurement data produced by the Apps. We may collect the Apps version, device hardware model, device operating system (OS) version, language and region settings, or timestamp.
- Apps crash reports. When the App crashes, we may collect information relating to the crash including device state, device hardware model, device OS version, and software processes that triggered the crash.
- Apps usage and interactions. We may collect statistics about the behavior of users of the App to understand how they interact with the App and for error reporting.
Information We Disclose.
We disclose personal data with other parties for the purposes stated herein or as required by law. The following lists the categories of entities we’ve disclosed personal data with, including over the past year.
We disclose personal data to our Customers (your current or potential employer) that utilize our services. For instance, if you are a job applicant and you respond to a job posting, we will disclose your personal data to the employer in order to facilitate the job search and hiring process. If your current or former employer uses one of our Services, personal data you input into those Services is accessible by that employer’s end users - subject to the security and access controls set up by the employer. In addition, if you sign up for an Access membership, we may disclose your personal data with Customers and their designated agents for recruitment purposes. You may cancel your Access membership at any time.
We disclose personal data to services providers to provide services on our behalf. For instance, we use service providers to facilitate our support services, data security, email, web hosting, research and analytics, data enrichment services, deliver and help us track our marketing and advertising content, process credit card payments, deliver payroll processing and disbursements, coordinate our customer conferences, and manage our sales and customer relations.
We work with other entities to perform research, under controls that are designed to protect your privacy. We publish or allow others to publish insights, presented as either aggregated, anonymized, de-identified, or non-personal data.
If you download or access content on our Services or attend an event or webinar we host or co-host, we may disclose your personal data to sponsors of the event or webinar. The sponsor may also be a controller of your personal data in this instance, and processing of your personal data will be subject to the sponsors’ privacy statements as well.
As explained in detail above in the "Online Analytics and Advertising" section, we may disclose your information to third parties that assist in tailoring and serving advertisements that are relevant to you. We may also allow third-party advertising technologies (e.g., ad networks and ad servers) to use cookies and similar technologies on the Services to deliver relevant and targeted content and advertising to you on the Services and other websites you visit and applications you use.
We may also disclose personal data where you provide your consent or post your personal data publicly. Where required by law, additional consent is obtained before personal data is transferred to us or forwarded to other parties. For example, we disclose personal data with background check providers if a job applicant consents and we are instructed to do so by our Customers.
During your use of the Services, you may have the opportunity to visit or link to other websites, including websites by third parties unaffiliated with us. We have no relationship or control over unaffiliated websites. These websites might collect personal data about you, and you should review the privacy policies of such other websites to see how they treat your personal data.
We also disclose personal data or data in order to meet any applicable law, regulation, legal process or enforceable governmental request, investigate violations and enforce policies (including our Terms of Service, this Policy and other contracts with you), detect, prevent, or otherwise address fraud, protect against harm to the rights, property or safety of our users or the public, protect your vital interests or the vital interests of another natural person; and where disclosure is necessary for establishment, exercise or defense of legal claims or where there is reasonable belief that disclosure is required by law or regulations
We may transfer or disclose personal data to another entity who acquires or may acquire any or all of our business units, whether such acquisition is by way of merger, consolidation or purchase of all or a substantial portion of our assets, or bankruptcy. We disclose personal data to our affiliates with our Customers’ consent in order to facilitate any Service transition or implementation services.
Mobile information will not be shared with third parties/affiliates for marketing or promotional purposes. We do not sell or share SMS opt-in consent data with third parties for their own marketing purposes. We may share information with service providers solely as necessary to deliver SMS communications on our behalf (for example, messaging vendors/subprocessors), and only for that purpose and in accordance with applicable law. SMS opt-in data and consent will not be shared with any third parties for marketing or promotional purposes.
International Users
Please be aware that we are based in the United States and the information we collect will be transferred to, processed, and stored on our servers in the United States in accordance with this Privacy Policy and applicable laws. The data protection laws and regulations applicable to your information transferred to the United States may be different from the laws in your country of residence. We take appropriate steps to protect, process, and transfer your information only in accordance with this Privacy Policy and applicable law, which may include using standard contractual clauses or other transfer mechanisms.
Your Data Rights and Choices
In accordance with applicable law, we may send you marketing and promotional emails. If you would like to opt out of email marketing, notify us at privacy@neogov.com or follow the unsubscribe instructions in the email. Please note that even though you may opt-out of receiving marketing-related communications from us, we may still send you important administrative and transactional messages (e.g., notifications regarding updates to our legal terms).
Depending on your jurisdiction, you may have the right, in accordance with applicable data protection laws, to make requests related to your “personal information” or “personal data” (as such terms are defined under applicable law, and collectively referred to herein as “personal information”). Specifically, you may have the right to ask us to:
- Inform you about the categories of personal information we collect or disclose about you; the categories of sources of such information; the business or commercial purpose for collecting your personal information; and the categories of third parties with whom we disclose personal information.
- Provide you access to and/or a copy of certain personal information we hold about you.
- Correct or update personal information we hold about you.
- Delete certain personal information we have about you.
- Provide you with information about the financial incentives that we offer to you, if any.
- Restrict or object to certain uses of your information.
- Opt you out of the processing of your personal information for purposes of profiling in furtherance of decisions that produce legal or similarly significant effects, if applicable.
Please note that certain information may be exempt from such requests under applicable law. For example, we need certain information in order to provide the Services to you.
You may also have the right to opt out of “sales” of your information and “sharing/processing of your information for targeted advertising” as described below. If you are a California resident, please see the “Notice to California Residents” section below for more information about our privacy practices and your rights.
As provided in applicable law, you also have the right to not be discriminated against for exercising your rights. Please note that certain information may be exempt from such requests under applicable law. For example, we need to retain certain information in order to provide our services to you. We also need to take reasonable steps to verify your identity before responding to a request, which may include, at a minimum, depending on the sensitivity of the information you are requesting and the type of request you are making, verifying your name and email address. If we are unable to verify your identity, we may be unable to respond to your requests.
To exercise any of these rights, you can contact us at privacy@neogov.com with your name and type of request you are making, you can also send your request by clicking here:
You may be able to designate an authorized agent to make requests on your behalf. In order for an authorized agent to be verified, you must provide the authorized agent with signed, written permission to make such requests or a power of attorney. We may also follow up with you to verify your identity before processing the authorized agent’s request as permitted by applicable law.
Depending on applicable law, you may have the right to appeal our decision to deny your request, if applicable. We will provide information about how to exercise that right in our response denying the request. You also have the right to lodge a complaint with a supervisory authority.
Notice of Right to Opt Out of Sales of Personal Information and Processing/Sharing of Personal Information for Targeted Advertising Purposes
If you are a resident of certain U.S. states, you may also have the right to opt out of “sales” of your information and “sharing/processing of your information for targeted advertising.”
As explained in the “When We Disclose Your Information” and "Online Analytics and Advertising" sections above, we sometimes disclose information to third-party advertising providers for targeted advertising purposes or use advertising analytics partners to assist us in analyzing use of our services and our user/customer base. Under applicable law, the disclosure of your personal information to these third parties to assist us in providing these services may be considered a “sale” of personal information or the processing/sharing of personal information for targeted advertising purposes.
If you would like to opt out of the disclosure of your personal information for purposes that could be considered “sales” for those third parties' own commercial purposes, or “sharing” or processing for purposes of targeted advertising, please visit "Your Privacy Choices" which is available in the footer of our Services. Note that you will need to opt out on each device you use to access the Services.
Please note that we do not knowingly sell the personal information of minors under 16 years of age.
Notice to California Residents
If you are a California resident, the California Consumer Privacy Act, as amended (“CCPA”), requires us to provide you with the following additional information about: (1) the purpose for which we use each category of “personal information” (as defined in the CCPA) we collect; and (2) the categories of third parties to which we (a) disclose such personal information for a business purpose, (b) “share” personal information for “cross-context behavioral advertising,” and/or (c) “sell” such personal information.
Under the CCPA, “sharing” is defined as the targeting of advertising to a consumer based on that consumer’s personal information obtained from the consumer’s activity across websites, and “selling” is defined as the disclosure of personal information to third parties in exchange for monetary or other valuable consideration. Our use of third-party analytics services and online advertising services as discussed in detail in our Privacy Policy may result in the sharing of online identifiers (e.g., cookie data, IP addresses, device identifiers, and usage information) in a way that may be considered a “sale” under the CCPA. The following chart details our practices in this regard.
|
Category of Personal Information
|
Purposes of Use
|
Categories of Third Parties to Which It was Disclosed
|
Categories of Third Parties to Which NeoGov “Shares” and “Sells” this Personal Information for Advertising/Analytics Purposes
|
|
Identifiers (e.g., name, User ID, mailing address, email address, phone number, IP address, device information)
|
Provide and maintain our Services; Provide goods and services; Communicate with you; Analytics and improvements; Marketing and advertising; Legal purposes; With your consent.
|
Affiliates; service providers; online advertising and analytics partners; entities for legal purposes; entities for organizational transfers; with your consent.
|
Online advertising and analytics partners.
|
|
Profile data (including employment and education history)
|
Provide and maintain our Services; Provide goods and services; Communicate with you; Analytics and improvements; Marketing and advertising; Legal purposes; With your consent.
|
Affiliates; service providers; online advertising and analytics partners; entities for legal purposes; entities for organizational transfers; with your consent.
|
Online advertising and analytics partners.
|
|
Sensitive personal information (e.g., bank account numbers, insurance policy numbers, credit card numbers, race/ethnicity, payment information, account log-in credentials)
|
Provide and maintain our Services; Provide goods and services; Communicate with you; Analytics and improvements; Legal purposes; With your consent.
|
Affiliates; service providers; entities for legal purposes; entities for organizational transfers; with your consent.
|
We do not share/sell.
|
|
Audio, electronic, visual, thermal, olfactory, or similar information (e.g., recordings of calls or meetings)
|
Provide and maintain our Services; Provide goods and services; Communicate with you; Analytics and improvements; Legal purposes; With your consent.
|
Affiliates; service providers; entities for legal purposes; entities for organizational transfers; with your consent.
|
We do not share/sell.
|
|
Commercial information (e.g., records of transactions and purchases)
|
Provide and maintain our Services; Provide goods and services; Communicate with you; Analytics and improvements; Marketing and advertising; Legal purposes; With your consent.
|
Affiliates; service providers; online advertising and analytics partners; entities for legal purposes; entities for organizational transfers; with your consent.
|
Online advertising and analytics partners.
|
|
Internet or other electronic network activity (e.g., information about your interaction with the Services)
|
Provide and maintain our Services; Provide goods and services; Communicate with you; Analytics and improvements; Marketing and advertising; Legal purposes; With your consent.
|
Affiliates; service providers; online advertising and analytics partners; entities for legal purposes; entities for organizational transfers; with your consent.
|
Online advertising and analytics partners.
|
|
General Geolocation data (inferred from IP address)
|
Provide and maintain our Services; Provide goods and services; Communicate with you; Analytics and improvements; Legal purposes; With your consent.
|
Affiliates; service providers; entities for legal purposes; entities for organizational transfers; with your consent.
|
We do not share/sell.
|
|
User-generated content or feedback that you provide
|
Provide and maintain our Services; Provide goods and services; Communicate with you; Analytics and improvements; Legal purposes; With your consent.
|
Affiliates; service providers; entities for legal purposes; entities for organizational transfers; with your consent.
|
We do not share/sell.
|
|
Inferences drawn from any of the information identified herein
|
Provide and maintain our Services; Provide goods and services; Communicate with you; Analytics and improvements; Marketing and advertising; Legal purposes; With your consent.
|
Affiliates; service providers; online advertising and analytics partners; entities for legal purposes; entities for organizational transfers; with your consent.
|
Online advertising and analytics partners.
|
For more information about each category, purpose of use, and the third parties to which we disclose or share information, please see the “Personal Data We Collect About You and Why” and “Information We Disclose” sections above.
You have the right to opt out of our sale/sharing of your personal information for purposes of certain online analytics and advertising by visiting "Your Privacy Choices” which is available in the footer of our Services. Note that you will need to opt out on each device you use to access the Services.
If you have a legally-recognized browser-based opt out preference signal turned on via your device browser, we recognize such preference in accordance with applicable law.
In addition to the rights set forth in the section above on “Your Choices Regarding ‘Sharing’ and ‘Selling,’” California residents may make certain requests about their personal information under the CCPA as set forth in the section above in our Privacy Policy on “Rights Regarding Your Information.”
The CCPA also allows you to limit the use or disclosure of your “sensitive personal information” (as defined in the CCPA) if your sensitive personal information is used for certain purposes. Please note, in the limited circumstances that we process sensitive personal information (such as health information, ethnicity, and biometric information) as defined in the CCPA, we do not use or disclose it other than for disclosed and permitted business purposes for which there is not a right to limit under the CCPA.
California Law permits customers who are California residents to request certain information once per year regarding our disclosure of “personal information” (as that term is defined under applicable California law) to third parties for such third parties’ direct marketing purposes. To make such a request, please email us at privacy@neogov.com.
Do Not Track (“DNT”) is a privacy preference that users can set in certain web browsers. DNT is a way for users to inform websites and services that they do not want certain information about their webpage visits collected over time and across websites or online services. Except as otherwise described herein with respect to legally required browser based opt outs, we do not recognize or respond to browser-initiated DNT signals, as there is no industry-wide framework for DNT signals. To learn more about Do Not Track, you can do so here.
Your Rights and Control under EU GDPR.
Our Customers use our Services to post job opportunities, evaluate job applicants, manage their human resource activities, and train their workforce. In conducting these activities, the Customer maintains control over what personal data is collected, how it is used, how long it is retained, and who it is disclosed to. For purposes of the EU GDPR, the Customer is considered a data controller in these respects and we are a data processor. In other instances, such as when we use cookies or contact you about our Services, we will determine the means and purpose of processing.
For personal data subject to the European Union General Data Protection Regulation and ePrivacy Directive, we rely on multiple legal bases for processing, including:
Consent. In certain cases, we ask you for your consent to process your personal data, for instance, for certain marketing purposes. You can withdraw your consent at any time; however, this will not affect the lawfulness of the processing before your consent was withdrawn. You can withdraw your consent by using the prompts within the messages you receive, the settings within your account, or by contacting our support using any of the privacy support emails listed at the end of this Policy.
Legitimate Interest. We process certain personal data for our legitimate interests. These legitimate interests include contacting you to provide support or sending you marketing information (subject to applicable law); detecting, preventing, and investigating illegal activities and potential security issues; and maintaining and improving our Services. We will balance our interests, the purpose and necessity of processing, and the rights and risks to you before we process for legitimate interests.
Performance of a Contract We process personal data to perform our obligations under an agreement with you or our Customers. For example, we use payment information you provide when you purchase a Service.
Other Legal Bases. In some cases, we may have a legal obligation to process your personal data, such as in response to a court or regulator order. We also may need to process your personal data to protect vital interests, or to exercise, establish, or defend legal claims.
We use an automated chat bot within some of our Services to screen your requests and questions. The purpose of the automated chat bot is to fulfill frequently asked questions provided by our users, tag the requests and questions to route to our most appropriate contact, and improve our responses and Services. The chat bot is not fully automated and will not have a legal or significant impact on you.
Data Security and Integrity.
We implement physical, technical, and administrative safeguards designed to maintain data accuracy, integrity, and security, prevent unauthorized access, and facilitate correct use of personal data. Our security measures take into account the risk of harm to you and Customers, as well as the availability of technology, industry common practices, effectiveness of mitigation controls, and the sustainability of those controls by us.
Although we maintain the controls listed herein, transmission of data is not without risk and the complete security of your personal data cannot be guaranteed. Please note, you are responsible for keeping your login credentials secret at all times, including your username and password.
Retention and Removal.
For personal data we determine the purposes for and means by which it is processed, such personal data will not be kept for longer than necessary for the original purpose of collection, when no longer relevant, or upon permissible request. When the original purpose no longer exists, we will either delete or de-identify it (subject to applicable law) or, if this is not possible, we will securely store your personal data until deletion is possible. Your personal data will be appropriately disposed in a manner designed to ensure it cannot be reconstructed or read. If you are a job applicant, after your account has been closed, we may retain De-Identified Platform Data as permitted by law.
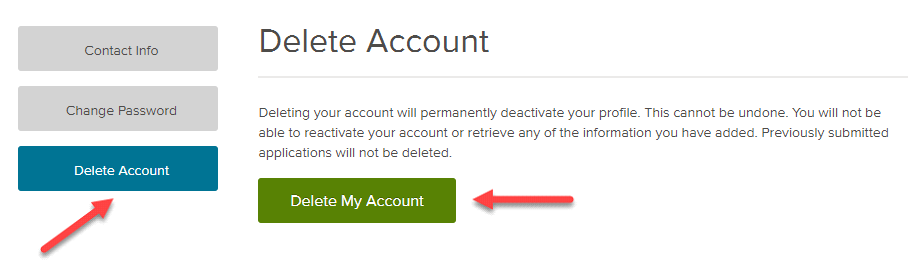
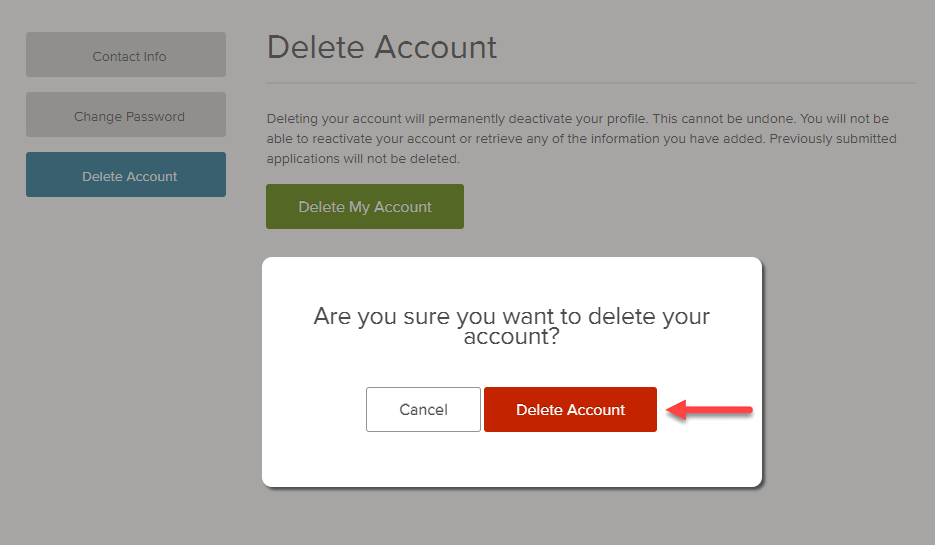
Where our Customer is the controller of your personal data, our retention policies and procedures are designed to allow Customers to comply with their own record retention requirements. If you are a job applicant that deletes your profile with us, your personal data will be removed or de-identified with our job applicant database; however, your data may persist within the applications you previously submit to our Customers until Customer disposal. Job applicants should contact the Customer they sent the application to if they seek enforcement of eligible data rights in that application.
Right to Revise.
We reserve the right to revise our Policy to reflect changes in our online information practices or to comply with the law by publishing a new version on our website. In circumstances where we materially change this Policy, we will provide you with appropriate notice in accordance with legal requirements. By continuing to access and use the Services, you are confirming that you have read and understood the latest version of this Policy.
Contact Details.
This website is owned and operated by Governmentjobs.com, Inc. (DBA “NEOGOV”). Our principal place of business is at 2120 Park Place, Suite 100, El Segundo, CA 90245, United States. You can contact us by email, telephone, or regular mail using the contact information listed herein.
Privacy Contacts.
If at any time you have questions or concerns about this Policy, please feel free to call us at (877) 204-4442 or e-mail us at privacy@neogov.com.
You can also contact our data protection manager at dpo@neogov.com.
Users who have a visual disability may be able to use a screen reader or other text-to-speech tool to review the contents of this Policy. If you experience any difficulties assessing the information here or you wish to obtain a copy of this Policy, please contact us using the details above.






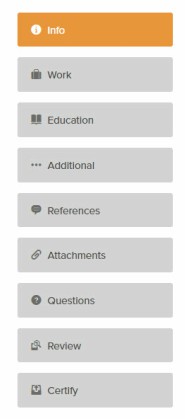
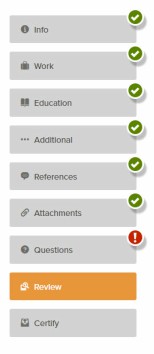

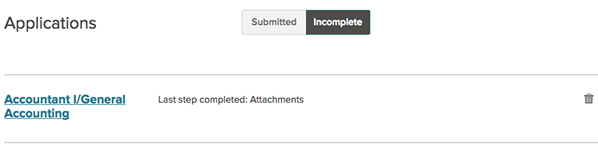
 to open this item and correct any errors.

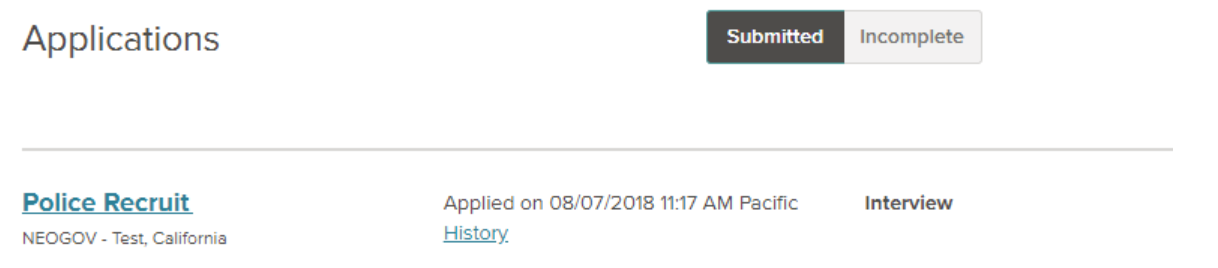
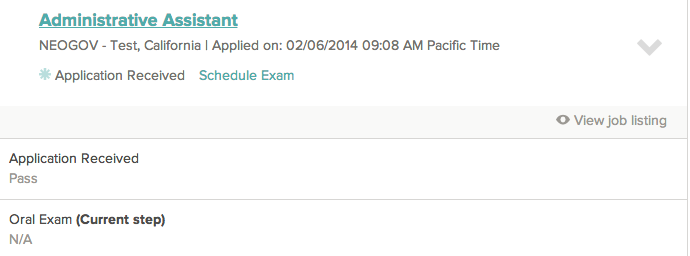
 to see more information. This can include a summary of the steps in the hiring process: